|
|
Joined: Oct 2009
Posts: 1,717 Likes: 2
|
OP

Joined: Oct 2009
Posts: 1,717 Likes: 2 |
As per my last thread on �Horrible SA runners� I want to address the �how to� of the removal of the upper scabbard fitting screws and the dagger throat, so as to see the dagger runners and the condition they are in.
I would like to mention again the statement I have echoed on �The Horrible Runners� thread,
�This process is for those who are gifted in mechanics and are able to see things for what they are, through examination and application. If this is not you, then in all regards dont attempt it!!
I feel that this process of taking down a scabbard is not for everyone and I would highly recommend,, if you choose this route, buy a junky SA dagger and take it down.
For a better outcome plan to make time with no distractions, this process will take a few hours if done correctly. Most of the time spent will be on cleaning the runners
Take your time and try to do everything,, on the frst time,, IMO there is no room for any error which could be costly. Hardware stores do not carry replacement runners if you snap them off or you lose a period screw. Lets get started!!....
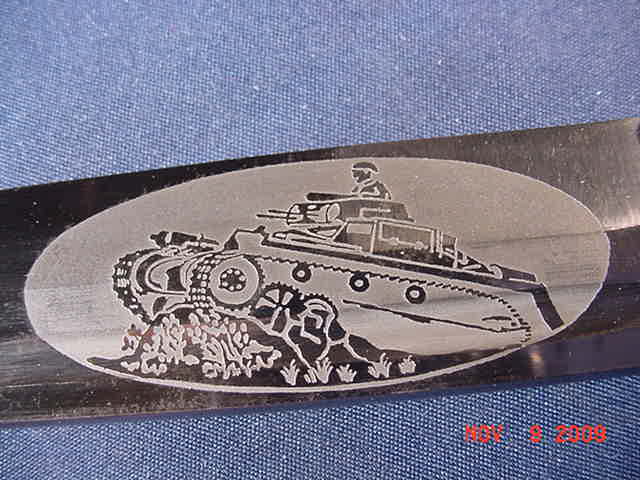
The early SA dagger �Gebr Becker� which is listed below
Historical Stewardship is a Trusted Honor that must be kept!
|
|
|
|
|
Joined: Oct 2009
Posts: 1,717 Likes: 2
|
|
OP
Joined: Oct 2009
Posts: 1,717 Likes: 2 |
These are some tool items I prefer to use .
Historical Stewardship is a Trusted Honor that must be kept!
|
|
|
|
|
Joined: Oct 2009
Posts: 1,717 Likes: 2
|
|
OP
Joined: Oct 2009
Posts: 1,717 Likes: 2 |
I use a pin-oiler with WD-40 in it. It is not necessary to have this item, but keeps things clean with no overuse of lubricant,, just enough to the area. Any hardware store has disposable WD-40 oilers also,, or even a paper clip would be sufficient by dipping it into a little WD-40. Here is the website below if interested in a Pin Oiler. This is great to have at home for other small projects or repairs. http://www.garrettwade.com/product.asp?p...p;zmap=30C03.01
Historical Stewardship is a Trusted Honor that must be kept!
|
|
|
|
|
Joined: Oct 2009
Posts: 1,717 Likes: 2
|
|
OP
Joined: Oct 2009
Posts: 1,717 Likes: 2 |
A small headed screw driver can be obtained in a decent screw driver set that has a wide range of fittings. Also included are those Ratchet sets that have the different size screw bits. Find the right one to fit,,BUT NOT BEFORE getting something to magnify what you are looking at. Unless you have �Eagle eyes� and can see small up close then you wont need the jewlers eye glass�.At least not yet,, wait until a few years pass, Then you might have to address this part again.  For me I choose to use the Jewelers eye glass when taking out and putting back the screws.
Last edited by Siegfried B; 08/15/2011 02:50 AM.
Historical Stewardship is a Trusted Honor that must be kept!
|
|
|
|
|
Joined: Oct 2009
Posts: 1,717 Likes: 2
|
|
OP
Joined: Oct 2009
Posts: 1,717 Likes: 2 |
Lastly a small piece of a light wood and a small scrap of cloth,,, this will be needed to push up and off the throat once the screws are removed. A small headed hammer will be sufficient for this process of tapping the wood.
There is one thing that you don�t want to take a chance on is finding out that the screws will not turn, because of the amount of time the upper fitting has been left untouched. These nickel screws will smear like butter if they are in tight! Sometimes they do and other times they don�t. DON�T TAKE THIS CHANCE
Add an extra step for preventive maintenance and oil the screws first. For me WD-40 works the best,, it is a thin and fast acting lubricant.
Apply a small drop of oil to the screws (( Wipe clean the area after a few seconds because the oil will act fast going to the threads)) Wait about 15 minutes for the oil to sink in before going to the next step
Historical Stewardship is a Trusted Honor that must be kept!
|
|
|
|
|
Joined: Oct 2009
Posts: 1,717 Likes: 2
|
|
OP
Joined: Oct 2009
Posts: 1,717 Likes: 2 |
It is very important that you use a screwdriver head that fits perfectly as you can see in the photo below. There is no margin for error if it fits tight and no chance of the screw driver sliding out of position. Remember you want to try to do everything right the first time if possible. The last thing anyone needs,, is a gouge in their nickel scabbard fitting�.take your time!!
Slowly and carefuly in little movements ,, start to turn the screw. Keep your scabbard above a white piece of paper and close to the table for less distance if the screw falls out before you can catch it with your fingers. If you lose it on the floor,, later on the vacumm cleaner will find it when it makes that big rolling sound in the suction feed,, then you�ve found it!! ONE SCREW AT A TIME.
Get yourself a self containment unit,, like a plastic lid and draw on a piece of paper an image of the upper scabbard fitting. The screws you take out of that position must go back in the same way and in the same threaded hole. This is extremely important so as , not to strip the threads.
Last edited by Siegfried B; 08/15/2011 02:52 AM.
Historical Stewardship is a Trusted Honor that must be kept!
|
|
|
|
|
Joined: Oct 2009
Posts: 1,717 Likes: 2
|
|
OP
Joined: Oct 2009
Posts: 1,717 Likes: 2 |
In these next few photos as you can see that the screws are still in place,,and that is because I have already cleaned the runners,,BUT I am showing you just the sequence of movements. I do not want to take this scabbard down again if I don�t have to. The less I do this the better it will be for the preservation of the dagger.
Once the screws are out and put off to the side in a safe place,, this next action is also very tricky. DO NOT REMOVE THE THROAT YET!! I say this to warn you,, as it will be the same thing as not to mix up the direction of the throat front and back. The throat must go back in the same way it was taken out!
For 2 reasons
#1 the scabbard screw threads must coincide with the upper scabbard "Fitting" screw threads
#2 it would be ideal for the runners to be the same when it is up against the blade
I like to put a small mark on top of the throat or a letter �F� for front on top of the throat entrance. I use a childrens erasable marker that can easily be wiped off when the throat is put back into the scabbard. Also take notice to any markings you may see on the throat itself once it is removed to help you remember which position it was in after it was taken out.
Last edited by Siegfried B; 08/15/2011 02:54 AM.
Historical Stewardship is a Trusted Honor that must be kept!
|
|
|
|
|
Joined: Oct 2009
Posts: 1,717 Likes: 2
|
|
OP
Joined: Oct 2009
Posts: 1,717 Likes: 2 |
Now comes the throat removal. I like to take a clean cloth and wrap the anodized part of the scabbard, to protect it from any unwanted scratches.
Historical Stewardship is a Trusted Honor that must be kept!
|
|
|
|
|
Joined: Oct 2009
Posts: 1,717 Likes: 2
|
|
OP
Joined: Oct 2009
Posts: 1,717 Likes: 2 |
IN MY PERSONAL OPINION ((DO NOT)) SECURE THE SCABBARD IN A VICE //VICE GRIPS OR CHANNEL LOCS. You are really asking for heartbreak if you choose this route. You may as well take a few hundred dollars of worth off of your dagger because of a dent or a depression that will be left in the scabbard.
AGAIN TAKE YOUR TIME. I do this the old fashioned way, by piutting the wrapped scabbard on top of my thigh close to my knee and holding it down with my fore arm closest to my hand. With the same hand I use the small piece of wood to butt up against the throat lip and a small piece of cloth (not shown) at the foot of the wood piece,,, and with the other hand I tap the upper part of the wood lightly about 3 or 4 times with a small type hammer on both the front and back of the fitting until it starts to move,, upward.
It is important to do this process front and back in small increments so that the movement of the throat will evenly remove itself from the scabbard.
Last edited by Siegfried B; 08/15/2011 02:57 AM.
Historical Stewardship is a Trusted Honor that must be kept!
|
|
|
|
|
Joined: Oct 2009
Posts: 1,717 Likes: 2
|
|
OP
Joined: Oct 2009
Posts: 1,717 Likes: 2 |
Once the throat is out refer to my �Horrible SA Runners� thread for cleaning link is below http://phpstack-500133-1583587.cloudwaysapps.com/ubbthreads.php?ubb=showflat&Number=249897#Post249897 Once you have completed the Runner cleaning,, make sure that your runners are pretty close to being parallel to each other and straight. I believe if if are off by a mere fraction of an inch in this area,, there is no need to worry as during the assembly during the early period, that these runners were put in by hand also. But try to get it as close as possible. Doing all this on your knee as you don�t want to put the scabbard ball on a table top and start pushing down on the throat into the scabbard,, you might dent the ball or crush it. Carefully slide the throat back down into the scabbard while paying close attention to the mark you put on the throat opening defining the front or the back. The throat will go in up to the point where the runner rivet is positioned. ( this is normal ) Gently give it a slight wiggle and push the rivet past the top of the scabbard, and continue to push the throat down until it stops. Regardless if there is a gap or not between the throat lip and the upper scabbard fitting,, you want to take that small piece of wood and that small scrap of cloth and put it on top of the throat opening and tap it down the rest of the way. This is very important to do this also because the screw holes MUST line up perfectly!!
Last edited by Siegfried B; 08/15/2011 03:01 AM.
Historical Stewardship is a Trusted Honor that must be kept!
|
|
|
|
|
Joined: Oct 2009
Posts: 1,717 Likes: 2
|
|
OP
Joined: Oct 2009
Posts: 1,717 Likes: 2 |
Here comes the nail biter part!! .. carefully bring back your �screw containment unit� and get that jewelers glass out because this is where it will become very useful. That special screwdriver should be able to to hold that little screw on top of the driver blade because of the tight fit,, if not,, a dab of Ren wax on the blade head will be sticky enough to hold it on the driver blade.
Using your jewelers eye glass slowly and carefully bring the screw up to the opening of the threaded hole on the scabbard fitting. Some people like to put screws on anglebefore putting in the hole as to find the position of the opening,,, try not to do this but as best as you can put the screw in straight, and slightly turning it until it takes hold. Doing this will gaurantee that the screw will go in on the first try. TAKE YOUR TIME and take a breathe, if it doesn�t go in the first time,, try again. These are very small screws and have only 2 or 3 threads on it.
Once the screws are in tighten a little bit to the scabbard fitting. Don�t forget there are only about 2 or 3 threads on these screws and you don�t want to over tighten them in fear of stripping them.
Once this process is completed wipedown with a clean cloth and have a beer.. or two !!
Your dagger is now protected for the next 70 years. If you are still around by that time,,trade it in for a personal spaceship for 2,, it will be a nice down payment for that kind of craft and really take your wife to the moon!!
I hope that I was able to address all aspects of this topic and I welcome any feed back or any additions to this topic that I may not included. Best regards Larry
Last edited by Siegfried B; 08/15/2011 03:04 AM.
Historical Stewardship is a Trusted Honor that must be kept!
|
|
|
|
|
Joined: Jun 2002
Posts: 12,134 Likes: 282
|
|
Joined: Jun 2002
Posts: 12,134 Likes: 282 |
This is copied from a WAF topic Where Marc Paul [KingTiger] explains some dagger maintenance - http://www.wehrmacht-awards.com/forums/showthread.php?t=400448 - I'm a collector but not a dagger collector. But I do have a few that were brought back from WW 2 by my Great Uncles. I decided to do some maintenance and ran into this great topic. Both Mark and Ed Sunday mention the keys to all this is to go slow,,and the right tool, meaning a screwdriver! I'm a mechanic and checked those dagger screws carefully,,they are very easy to ruin with a regular slotted screwdriver. The best in my opinion is the gunsmith screwdriver,,or for us mechanics the 'hollow ground' slotted type.. Here is a couple shots of it in use: http://finegunmaking.com/page16/page16.htmlPlease feel free to explore on your own and maybe come up with another type. Thanks to Mark for the topic and sharing his experience! Here's the type fit you want and get with the hollow ground:
Last edited by Gaspare; 08/16/2011 05:50 AM.
|
|
|
|
|
Joined: Oct 2009
Posts: 1,717 Likes: 2
|
|
OP
Joined: Oct 2009
Posts: 1,717 Likes: 2 |
Thanks for the great post Gaspare! Probably the most and greatest indepth and detailed look into this subject is the thread on the WAF by Mark "KingTiger", and Ed Sunday. Please feel free to explore on your own and maybe come up with another type. Yes I agree,, The more information and creativity that is gathered in preservation and conservation, the greater the return for those who venture into this area. IMO it is very important to preserve History as much as possible if it is within our means, regardless of what type of collectable it is.
Historical Stewardship is a Trusted Honor that must be kept!
|
|
|
|
|
Joined: Dec 2010
Posts: 422
|
|
Joined: Dec 2010
Posts: 422 |
Excellent post Siegfried B, good tips to keep in mind when removing the sheath Daggers SA and SS, although I admit that I did not dare do that procedure.
|
|
|
|
|
Joined: Mar 2006
Posts: 5,814 Likes: 18
|
|
Joined: Mar 2006
Posts: 5,814 Likes: 18 |
Ed Sunday tutored me on doing this, but I have to admit that I have only done this once, on a police bayonet where the leatehr scabbard had shrunk and the blade wouldn't go all the way in. Very carefully, I did what Ed suggested, which is basically what is indicated here, and managed to get the throat off and the bands cleaned. But, I don't really think that I want to do this too many times. My heart couldn't take it  Great thread, both here and on WAF. John
Always looking for Eickhorns and etched bayonets.
|
|
|
|
|
Joined: May 2007
Posts: 623
|
|
Joined: May 2007
Posts: 623 |
Back in '64 I got my first SA. The scabbard needed to be painted as it had no paint. I got a can of chocolate brown enamel and sprayed it, of course sans fittings. Put a coat hanger in it and baked it in the oven for awhile.
Got it out of the oven and the weight, which I did not know was there, fell out. Retrieved it without burning myself and dropped it back in and let the unit cool down. I then reset the fittings and screws and it was a pretty nice job too!
One of you might have that SA today! I also changed out fitting screws and even fittings to make a nicer looking SA. You must remember that in those days, there were no books until Atwood and I got my pieces from gun shops and friends and knew no other dagger collectors!
|
|
|
|
Forums42
Topics31,671
Posts329,061
Members7,519
| |
Most Online5,900
Dec 19th, 2019
|
|
|
|


